Saturday, March 27, 2010

Tim Holtz Grunge Roses

For forever I've been wanted to make these Tim Holtz style roses... but I never seemed to find the right time.
This morning I made my mind up to do something just for me... and after two tries, I was able to make a satisfactory rose! (The first one was a mess. Glue not sticking well, petals not curling just right, ...)
The biggest thing for me tho, is that grunge paper seems to be a bit thick to make these roses. I think i will try with card stock next time. Either that, or the grunge paper I have is actually grunge BOARD and I need the paper version instead (if this actually exists).
I will check on this later when I get a chance. (I threw away the packaging it came in so I will have to do a little research).

Either way here's how it turned out! I used a tutorial off of youtube (click here for link). - she makes it look really easy!
The main things you need to start is a good glue (like SU Crystal Effects or Ranger Glossy Accents), three inked 6-petal flowers (Sizzix originals die FLOWERS #5 used here, scissors, paper clips to hold your work, and a thin paint brush handle for curling the petals.

I also used the TSUKINEKO travel sized SHIMMER SPRITZES (in frost, sparkler and copper) for added shimmer! And for some darker spritzes I used the same company - WALNUT INK Antiquing Solution in a spray. I LOVE THEM!

It was a interesting to put these together. I can't wait to make more indifferent colors and sizes.
Have a great weekend! And see you soon!

Tuesday, March 23, 2010

Vintage bookmarks

Here's something a little different.
I cut strips of fabric and sewed them with vintage red thread... then poked a hole and added charms and detail.
Love how they turned out. they have a real old world feel and lay so perfectly in between book pages.

Monday, March 22, 2010

Artists papers

I was looking through some issues of Somerset Studios Magazine and saw something really interesting.
The concept is similar to paper fabric... where you make a background using collage techniques for the base of your work. What I did was take Manga art pad paper (which is really sturdy) and collaged on a layer of french book pages. then gessoed over it (watered down a bit so the pages could show thru) and then painted with acrylic paints. Again letting some of the pages show thru.
Then I stamped on them, basically making my own designer paper!
I cut the sheet up into bookmark size pieces and then continues to collage or stamp/doodle on them. Each is one of a kind unique...
I really enjoyed making this set. I will try a different color base for my next set. Perhaps a blue... or ivory!
Getting started right away!
See you soon!

Wednesday, March 17, 2010

Spring is here!

I finally feel like Spring is here! It feels so great to go outside without my heavy coat on... It's WARM! YEA!

I spend most of today thinking about new ideas for my business. I want to add a line of bookmarks (baubles, paper and metal) and perhaps something else. I really like handmade beads... so I will incorporate them somehow.

I also have a few handmade journals I want to list as well. Each is hand made from the bare pages. I hand cut and hand bound each register ... covered chipboard for front and back cover and made a spine. Each is complete in fabric (some are patchworked) and have liners.
We'll see... not sure.

For now, I have two cards to share:
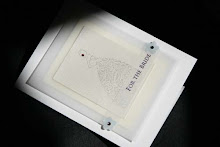
The Bridal Shower card is stamped in silver pigment ink and has a vellum cardstock liner. A swarovski crystal earring... and a satin red ribbon.
The easter card is a Stampin Up stamp colored in alcohol ink. with added satin ribbon and dimensionals for accents. Don't forget the vintage buttons!

Hope you are having a great week.
See you soon!

Monday, March 15, 2010

Beads... and more Beads!


I spent the better part of today making and listing Beads on greenNOTIONS. I made metallic beads, soft dainty ones and ones from hand made/decorated papers...
Fun!
My Favorite ones are these made from leftover Children's Wrapping Paper! I juts love what you can make out of things you might otherwise throw away...This week is going to fly by. I am preparing tons for the FINRA show coming up ... that will be my focus til the end of April.
Hope you have a great week! See you soon!

Friday, March 12, 2010

Happy Birthday To My ABBY!


Today is Abby's 7th birthday.
I can't believe how quickly time flies!
I love you with all my heart babe~...
Thanks for being my light!

Tuesday, March 9, 2010

Bookmarks! Fun with MICA

TODAY I spent a whole day with my friends crafting and having fun. It was just that... FUN!
I got to play around with MICA. Stacie shared some of this "odd" glass like material and I immediately thought ALCOHOL INKS!
I dabbed some on with some metallic ink and applied Then cut the mica to mimic a glass bottle.
I adhered the mica to my bookmark with just crystal effects glue. Made for a clear bond.

The middle bookmark was inspired by a designer paper that Stacie had in her stash! I love all of them. i think I'm going to make another and perhaps keep one for myself.

Well, Tomorrow - Back to the daily grind... which luckily for me is just what I love to do!
see you soon!

Quick one!

Quick! I only have a few minutes before I go meet my friends for our monthly crafting date!
I am so excited because today I just get to play! Usually I'm making cards for sale or finishing up some other business...but today... I am making BOOKMARKS! I signed up for a bookmark swap on ATCsFORALL.com and today is my fun day!

But before I go, I just wanted to share my daughter's art color wheel Kaleidoscope that is currently on display at the Delaplaine Art Gallery here in Frederick! We ran there after school yesterday so we could get a look at all the work! It is really amazing what the kids in FCPS are creating. From ceramics, paper mache, collage to portrait, pop and landscape art - I was really impressed by all the work.
I have to say THANK YOU to Mrs. Jachowski (her art teacher) for all that she is doing at the school. The kids really have a great love for the arts and it helps to have great teachers!

Ok! I have to gather my supplies and I'm OFF!.....
Have a great day!

Friday, March 5, 2010

TGIF!

Well... this has certainly been a challenging week. Thank goodness it's FRIDAY!

With the weekend will come some "feels like spring" weather! upper 50's and sunny - YEA~!

Something to do this weekend:
check out the FCPS All-County Student Art Exhibit at the Delaplaine.
Emily has an exhibit on display there... can't wait to see it. It is open to the public until the 28th and it's FREE!
Here's more info.

Something interesting to look discover:
Stacie has a step by step look at her jewelry making process on her blog now! click here! It's really impressive to see how much time and effort goes into each and every piece of jewelry regardless of size and shape!

and last but not least- Something I made today:
It's a bookmark made as a wedding favor. I really enjoyed making this. It reminded me how important works of the heart really are. Something that can be cherished and used as a reminder of something so special!

hOpE yOu HaVe A wOnDeRfUl WeEkEnD!!!

Thursday, March 4, 2010

SnuggleBUNNY...


Today's card is made with the stamp set: CUDDLEBUNNIES by My Favorite Things (www.mftstamps.com).
Reminds me of my many nights with my girls.
Every piece is stamped on several different papers and cut out for some paper piecing. The moon piece uses a mulberry paper with self adhesive. The star is glittered with ultrafine glitter by Stampin' Up!.
machine sewing with white thread around border of card base.

Monday, March 1, 2010

Love the PANDA!

This stamp was too cute - a meditating panda -yoga! I had to make it into a card.
These are 100% recycled card base (kraft in color) taken from reclaimed file folders! I get so excited when I can use recycled materials. It just plain FEELS GOOD!

These pandas are stamped onto designer paper and then stamped again on vintage white card stock... and again onto a scrap piece of the same designer paper!
The panda is cut out of the white card and the belly only is cut out of the scrap piece.
then everything is pieced together. Layer on layer and then raised with dimensionals... which are a Stampin' Up exclusive. I've used pop dots and foam squares before and nothing (NOTHING) compares to dimensionals. They are a STRONG adhesive and there is NO WASTE! (they are hexagonal in shape so there's no skeleton foam piece left!)
anyway, here it is!
Wishing HAPPINESS to all!